Automate Azure VM uptime schedule with Azure Automation & Bicep

Setup
There is more than one way to manage when your virtual machines in Azure should boot up and when they should shutdown. Today we will revisit some code I wrote some time ago that builds on components from another module I created.
We will use Azure Automation and Powershell runbooks to manage Azure Windows Virtual machines in this case. We will with the help of Azure Bicep automate the deployment of these key resources:
- Azure automation account with a managed identity, an RBAC assignment for the managed identity & two runbooks with some Powershell code
You can begin setting this up yourself by cloning my git-repo with all the base code inside it:
git clone git@github.com:carlzxc71/bicep-vmAutomation.gitor:
git clone https://github.com/carlzxc71/bicep-vmAutomation.gitand change into the cloned directory on your computer.
Deploy
First we need to ensure that we are authenticated to our Azure Environment, do this by running the following command:
az login
az account set -s "Name of subscription"
az account list -o table
If you are like me and have access to multiple subscriptions, the above commands will ensure you are configured to talk to the correct subscription for when we deploy our code. Make sure your subscription is listed as "true" under "IsDefault" in the output of the last command.
Now we will deploy our code and create our resoures, make sure you find your resource-group when running:
az group list -o tableIf you wish to create a new resource-group for the deployment you can run:
az group create --name <Name of RG> --location <location>
Example: az group create --name testRG --location westeurope
Now we are ready to deploy our code:
az deployment group create -g testRG --template-file build/main.bicep --parameters build/params.jsonQuick note: Check the "params.json" file before deploying and change anything you need to suit your environment. And if all goes well we should have a successful deployment.
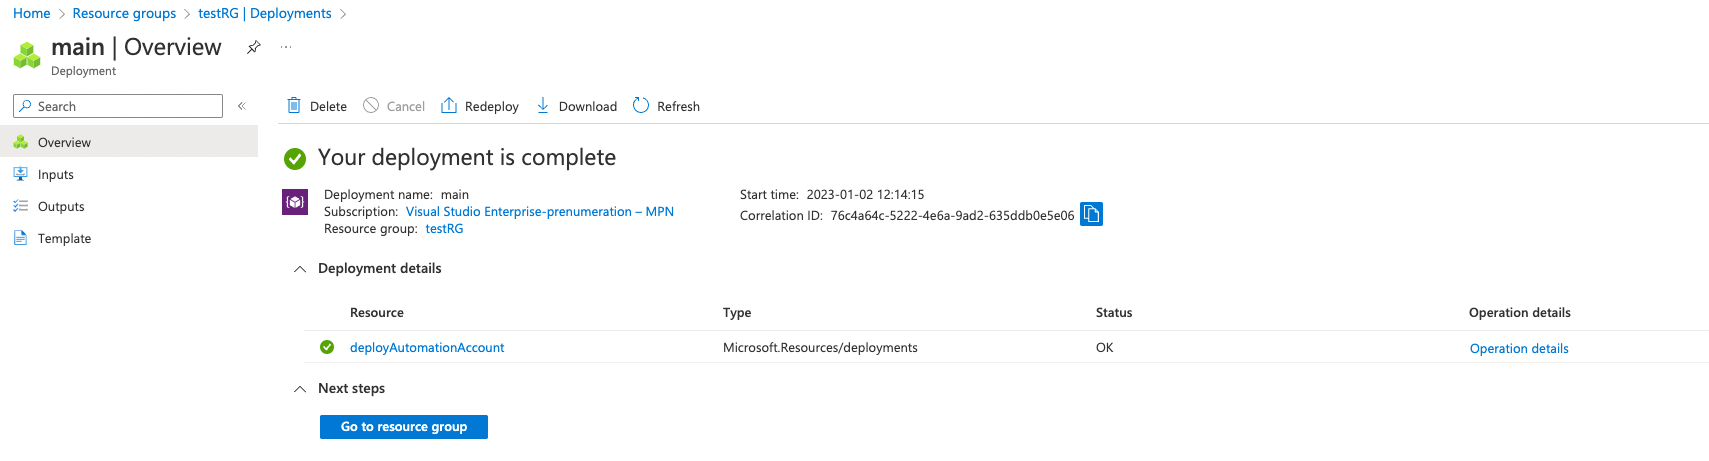
If you check the RBAC assignments on the resource group the managed identity of the automation account will now have VM contributor so it can turn machines on and off. All resources also receive deployment tags so we can keep track of what we have created.
Final configurations
Now that we have all of our resources deployed we simply need to put a few finishing touches on the two created runbooks that got created in the process. Go to the Azure Portal and search for Automation Accounts and chose the one we have created with our deployment, then in the meny select runbooks
- Select runbook Start-VM
- Select Edit
- Paste in the Powershell code from the Git Repo, you will find it in the folder called src
- Update the array at line 6 with the names of the computers you wish to manage, it can be one or more machines & update line 3 with the name of your resource-group
[CmdletBinding()]
param (
    [string] $resourceGroupName = "<Enter the name of the RGR>"
)
$azureVMs = @(
"bicepvm001",
"bicepvm002"
)- The script contains a forEach loop that will iterate through this list of computers
- Select Publish & Save to finish the configuration for the runbook
- When in the Overview of the Runbook select Start & OK (No need to supply the name of the RG again) - this may also take some time to complete
A successful run with look something like this:
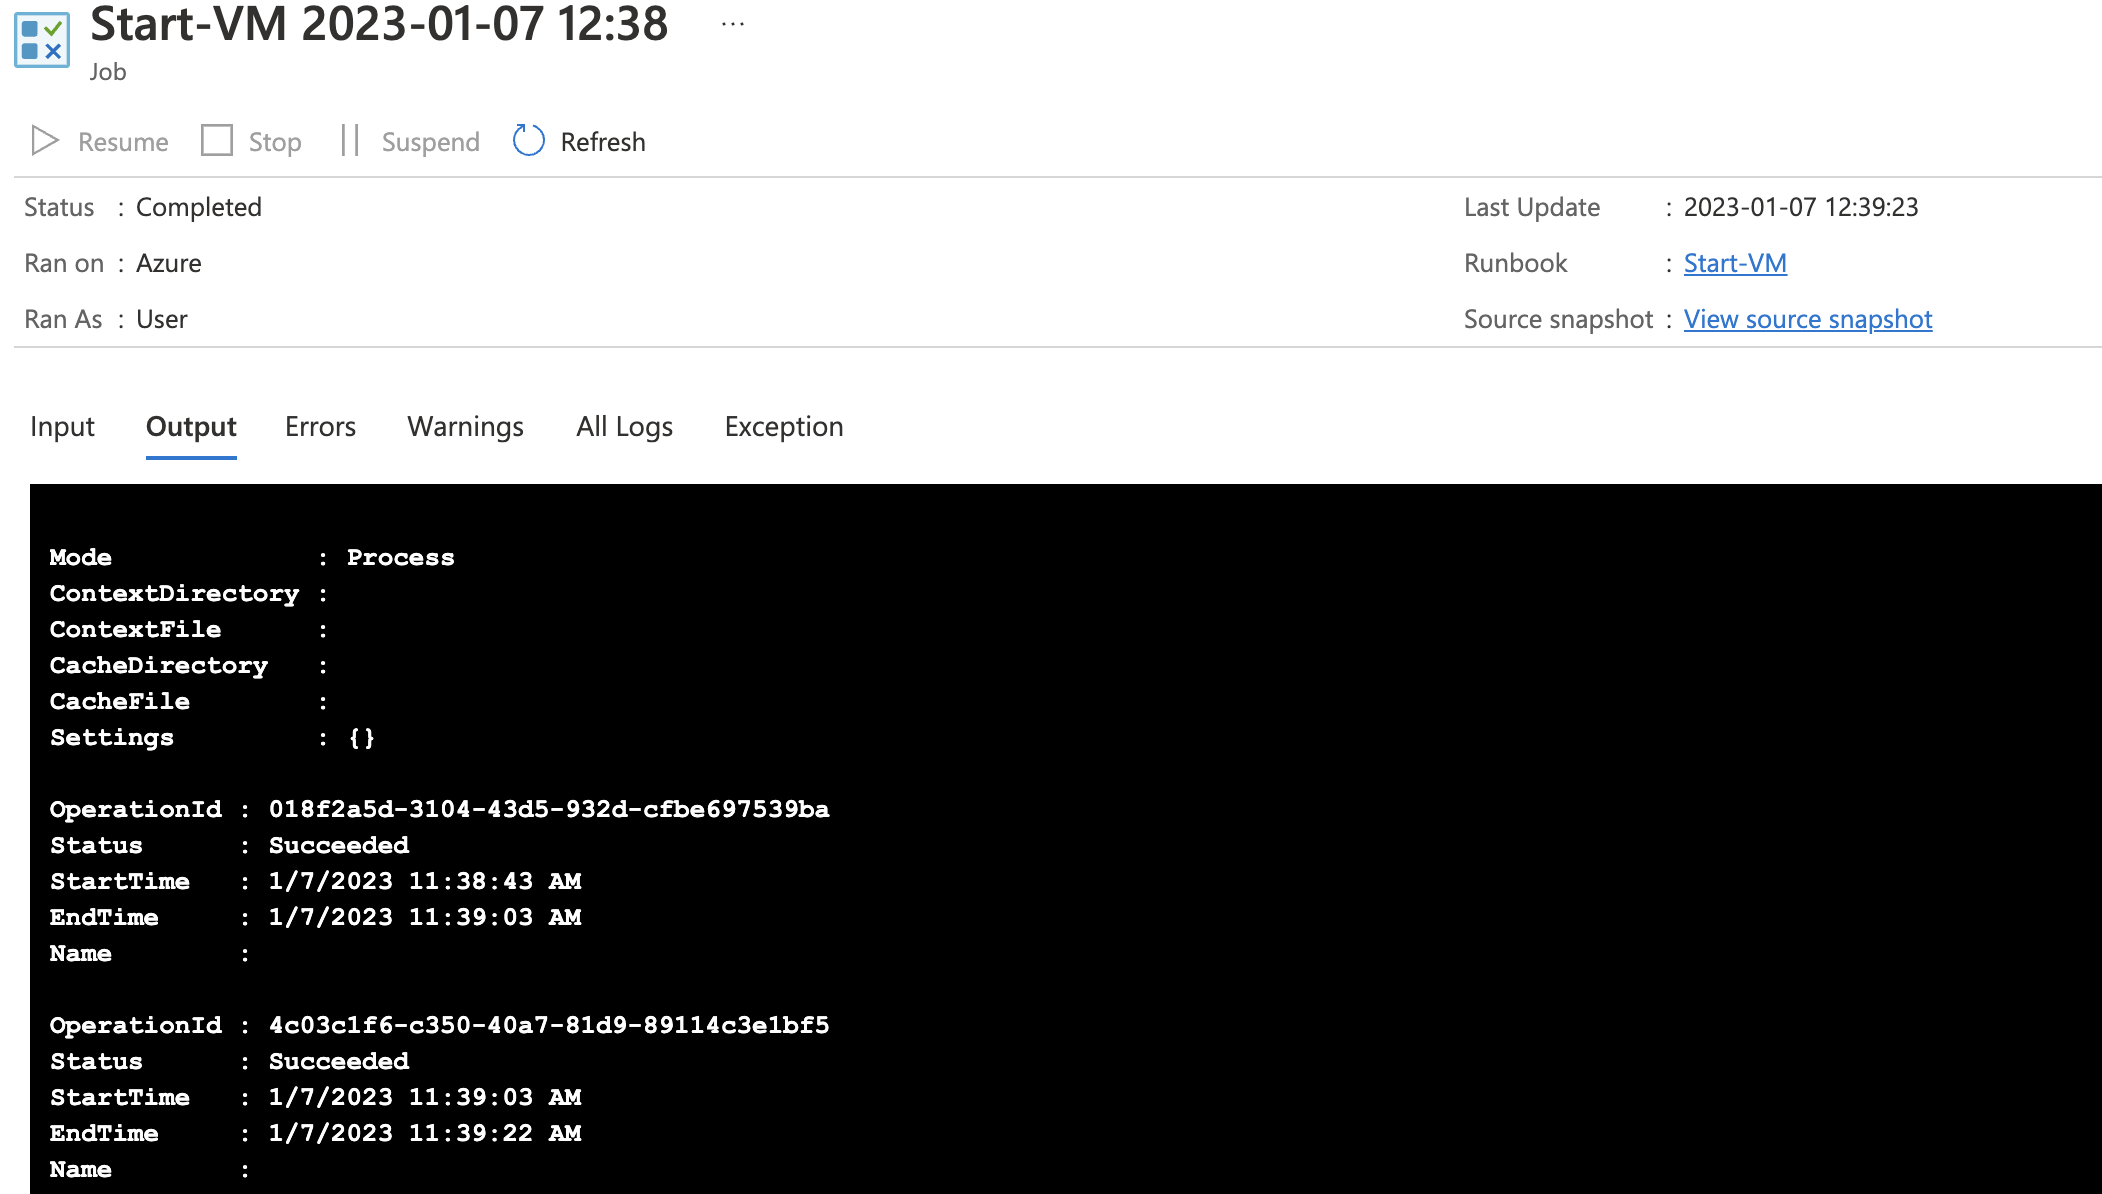
Now you just have to repeat the same process with the runbook & script called Stop-VM and you are finished with this portion of the setup.
Conclusion
You now have the ability to trigger a runbook that can power on & off as many virtual machines as you want. You can now take this one step further and link the runbook to a schedule:
This way you can ensure that machines are not powered on and billed for uptime when you do not need them or for making sure dev & test machines gets turned off if a technician forgets to do so manually.
What have you automated with Azure Automation recently? Would love to hear som feedback!
Here is the entire Powershell script for those interested in the code but does not require all the other things included in the repository:
Start-VM
[CmdletBinding()]
param (
[string] $resourceGroupName = "<Enter the RG you are working with here>"
)
$azureVMs = @(
    "bicepvm001",
    "bicepvm002"
)
$ProgressPreference="silentlyContinue"
Disable-AzContextAutosave -Scope Process
# Connect to Azure with system-assigned managed identity
$AzureContext = (Connect-AzAccount -Identity).context
# set and store context
$AzureContext = Set-AzContext -SubscriptionName $AzureContext.Subscription -DefaultProfile $AzureContext
# Stop the VMs
foreach($VM in $azureVMs){
Start-AzVM -ResourceGroupName $resourceGroupName -Name $VM -Confirm:$false
}Stop-VM
[CmdletBinding()]
param (
    [string] $resourceGroupName = "<Enter the RG you are working with here>"
)

$azureVMs = @(
    "bicepvm001",
    "bicepvm002"
)

$ProgressPreference="silentlyContinue"

Disable-AzContextAutosave -Scope Process

# Connect to Azure with system-assigned managed identity
$AzureContext = (Connect-AzAccount -Identity).context

# set and store context
$AzureContext = Set-AzContext -SubscriptionName $AzureContext.Subscription -DefaultProfile $AzureContext

# Stop the VMs

foreach($VM in $azureVMs){
    Stop-AzVM -ResourceGroupName $resourceGroupName -Name $VM -Confirm:$false -Force
}
Update
Some time after writing this article I stumbled upon a finished solution from Microsoft that also can handle this for you. If you want to check it out you can go here:
It requires some more resources but I have tested it and it works fine, even integrates some alerts for you!