Automating Alert Extraction with Azure Automation, powershell & Terraform
Introduction
Azure Monitor is a powerful tool for monitoring and analyzing the performance and health of your Azure resources. However, with a large number of resources and complex alert rules, it can be challenging to keep track of all the fired alerts. You may not want to give out more administrative access if you do not need to just so they can open Azure Monitor in the portal and browse and/or export alerts.
Having this automated can be very beneficial for non-technical roles in your org so they can present this data to customers if they are in more of a service delivery manager role for example.
In this blogpost, we will explore how to automate the process of extracting all fired alerts from Azure Monitor for the last month using Azure Automation and PowerShell, we will deploy everything with Infrastructure as Code (IaC) using Terraform.
I have built a Github Repository that contains everything we need and I will in this post walk you through the steps of implementing the solution.
Pre-requisites
You will need a few things to follow along:
- An Azure Subscription
- AZ CLI & Terraform installed
winget (Windows)
winget install -e --id Hashicorp.Terraform
winget install -e --id Microsoft.AzureCLI
homebrew (Mac):
brew install terraform
brew install azure-cli- Git (To clone the repo)
winget (Windows):
winget install -e --id Git.Githomebrew (Mac):
brew install gitDeployment
First we need to clone the git repo with all the code we require. You can run the following command:
git clone https://github.com/carlzxc71/azureMonitorAlertExport.git
cd azureMonitorAlertExport
cd deploy
You should be sitting in the deploy folder in your terminal now. Next we should sign into Azure:
az login -t <tenant-id>Make sure you are logged into the correct tenant and set your context to the correct Azure Subscription. If you want to switch to another subscription in your tenant enter:
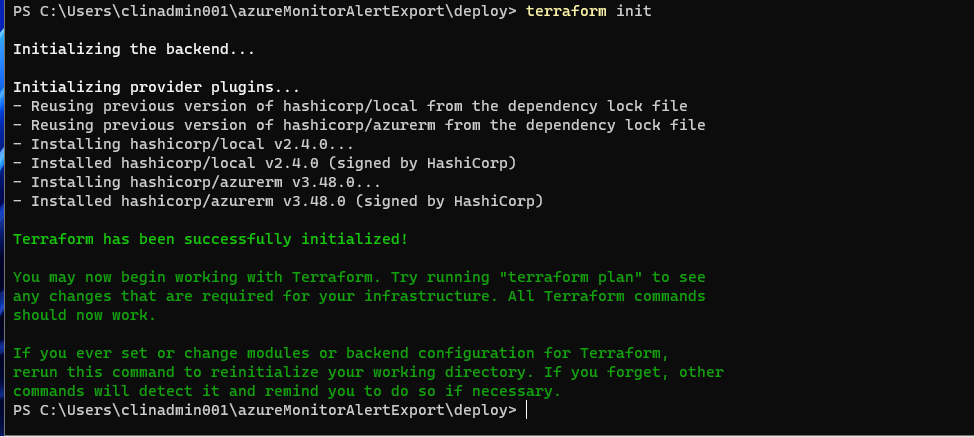
az account set -s <subscription-id>Next we want to innitiate our Terraform workspace. You can do this whilst sitting in the deploy folder and type the following in to your terminal:
terraform initIf successful:
Next we want to run a plan to see what will be created:
terraform planWe will add 11 "items"
- Resource group
- Automation Account
- Runbook jobschedule
- Schedule
- Runbook
- Automation variable
- Role assignment Contributor (Scope RG)
- Role assignment Monitoring Reader (Scope Subscription)
- Storage account (Will host the CSV file)
- Share
- Directory
If you are ready you can deploy all the items with:
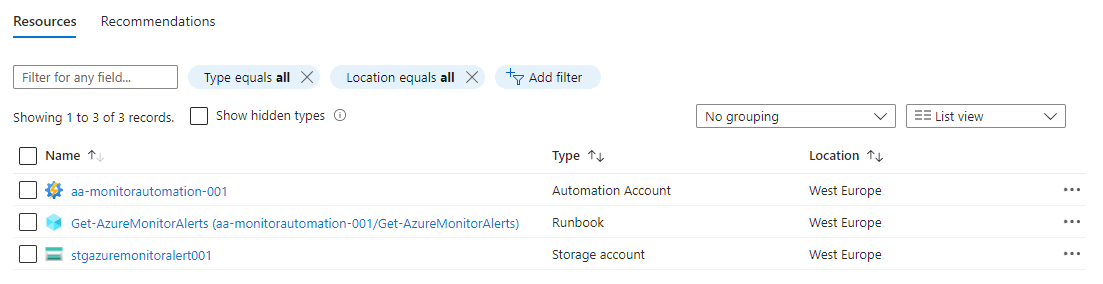
terraform apply -auto-approveAll the resources deployed:
Post-installation configuration and testing
There are some things that we need to complete in the portal after Terraform has deployed all resources. This could most definately also be automated as well with Terraform as we need to import powershell modules into the automation account.
For the scope of this guide I will just show you how to do it in the portal.
- Go to your Automation Account, if you did not change the name you can search for aa-monitorautomation-001
- In the left pane select Modules
- Select + Add a module
- Select Browse from gallery & Click here to browse from gallery
- Search for Az.Accounts & click Select
- Set the runtime version to 5.1 & Import
- Repeat steps 3-6 but with Az.Alertsmanagement (You may receive the error that it has a dependency to Az.Accounts, just wait some more time to allow the import of the previous module complete)
- Wait for the import to be completed for both modules. Status should go from Importing to Available
Now to test:
- In the left pane of the Automation Account select Runbooks
- Select Get-AzureMonitorAlerts
- You can select </> View to view the powershell script in its entirity
- Now we want to select > Start
- Wait until you have a Status: Completed and verify you do not have any warnings or errors.
- To verify successful output to the Storage Account browse to it in the Azure Portal, the name if left default is: stgazuremonitoralert001
- In the left pane select File Shares and select share01
- Select directory01
- If successful:
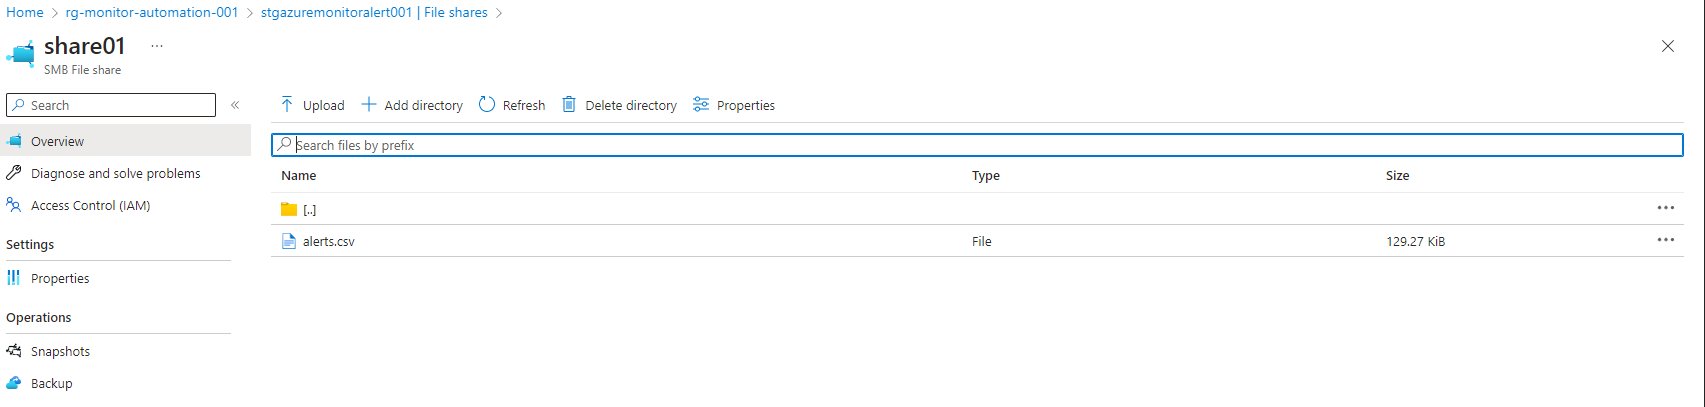
As you can see I have an alerts.csv here that contains all my alerts from the past 30 days! I can now download this file and use it anyway I see fit. You could also setup lifecycle management to automatically delete files and folders from the storage account, you can read more about that in another post of mine:

Notes & references
The schedule created per default is to run the following settings,which you can update if you wish:
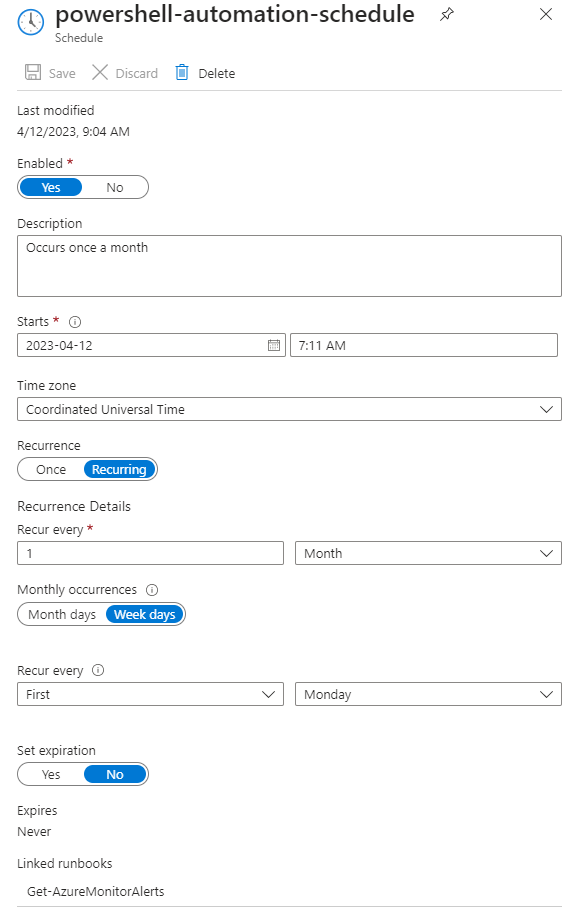
You can update this by changing the values in the variable runbook_schedule inside the terraform.tfvars file in the deploy folder in the Git project alongside many other variables.
For the entire Github Repo:
https://github.com/carlzxc71/azureMonitorAlertExport
About the author
